Sunday, August 16, 2009

Multi-Green Plarn (plastic yarn) Circles Necklace


I stumbled across this really neat light-weight, beautiful 2-tone green plastic and just had to make a necklace out of it. It's so soft against the skin you wouldn't believe it was plastic.

And, you couldn't believe what the circles are. You know when you open a water bottle or other plastic bottle beverage for the first time, you separate the cap from this circle that stays on the bottle. That's it!!!!

I connected the circles with jump rings and viola!!! I got so many compliments on it and it was the perfect enhancement for this outfit that needed that extra decoration...


Multi-Green Plarn (plastic yarn) Circles Necklace

I came across some absolutely fantastic, light-weight, beautiful 2 tone green plastic and just had to make a necklace out of it. It's so soft against the skin you wouldn't believe it was plastic.

Saturday, August 15, 2009

'Protect My Nails' Scrubbie Pattern with hosiery yarn


Sharing with everyone my harn (hosiery yarn) scrubbie pattern I designed. Harn scrubbies are absolutely awesome. I have made scrubbies out of just about every type of fiber and never satisfied. You will love your harn scrubbie. I created this particular crochet pattern, 'Protect My Nails' to protect my nails while doing household chores.

**The pattern is plarn (plastic yarn); tarn (t-shirt yarn) and fiber friendly.**

Supplies Needed (makes 1 scrubbie):
Size G Hook or hook of choice.
Hosiery yarn (approx 2 pairs)

Make 2 panels.

Chain (ch) 13 or number of chains needed to measure across all 4 fingers pressed together.

Row 1: Half double crochet (hdc) across to end, ch2 turn.

Row 2: Hdc in back loop (bl) only across to end, ch2 turn.
Repeat Row 2 until panel measures from tip of fingers to top of hand or desired length. Fasten off and weave in ends.

With wrong sides together at lower corner (right or left, you choose) single crochet (sc) through both panels in corner stitch and in each stitch across to next corner. Make 3 sc in corner and a sc in each stitch across to next corner. Make 3 sc in corner and a sc in each stitch across to opposite lower corner.

Fasten off and weave in all ends. It's ready to use when you are.

Copyright 2009 Plastique Recreations. All rights reserved.

Wednesday, July 29, 2009

'How To' Make Hosiery (pantyhose) Yarn aka Harn


I held an office job for many years and when I discovered a run in my pantyhose (after cursing) it immediately went into a basket. When I had enough to work with, they were transformed/recreated into something useful.

Hence, achieving 'One Less' in the landfill.

Not really sure what you would call yarn made out of hosiery. Plastic yarn is called 'plarn' and t-shirt yarn is called 'tarn' so maybe it makes the most sense to call hosiery yarn 'harn'???

Here is my tutorial for processing hosiery (pantyhose) into yarn:

Lay the pantyhose out on a cutting surface. Fold the panty section in half. Cut the panty off from the legs at the seam.


Special Note: Pantyhose is a very user-friendly, light weight material making it easy to cut through multiple layers. I've not had any difficulty lining up seems.

Lay each leg on top the other, even up toe and cut off about 1/2" below seam.


You now have something that looks like a tube with openings on each end. Lay these out on your ironing board and iron each leg. A polyester setting works perfect. (FYI - This is the same setting I use when fusing plastic, if that helps any.) Ironing the legs will stretch them to their full potential which makes cutting alot easier. You can see the difference, it's very obvious:


Cutting Steps:

I found the easiest way to cut hosiery into yarn is to use the 'Continuous (Single-Strand) Method: http://plastiqrecreation.blogspot.com/2009/04/continuous-single-strand-strip-cutting.html. Hosiery yarn is very similar to t-shirt yarn.

Lay the ironed tube on cutting surface and fold the bottom up to within about 1/2" from the top. Begin cutting strips starting from the bottom fold up to 1st fold. This leaves that 1/2" area to top fold uncut (what I call the spine). (NOTE: The width of the strips are determined by your project needs). A typical width is 1 to 11/2" wide.


Because this is such light weight material, I would suggest running a afghan hook, knitting needle, etc. through the middle of the spine separating the layers. It'll also might help if you straighten out each strip.

To make a single strip/continuous strand, place your scissors at one open end of the tube, cut the bottom off of the first section just under the spine.


To cut next strip, angle scissors upward from the previous cut section just under the spine to the top of the next section. Repeat this until you have reached opposite end of tube. Once you have reached the end, you should have one continuous strand.


Once you have reached the end, you should have one continuous strand.


Just like t-shirt yarn, to make a curl - take a section of the srip in each hand and pull. It'll curl up right before your eyes. Then move on to the next section and repeat until you have reached the end of the strip.
I have tried other method which I don't recommend. For example, the double-strand method: http://plastiqrecreation.blogspot.com/2009/04/double-strand-cutting-and-connecting.html.


Cut two strips (they would be very small) then loop together. As you can see, the knot isn't very small and would be very difficult to hide.


You could also cut two long strips and make a small cut at the top of each then loop together. As you can see, they tear easily and again would be very difficult to hide.


Stay tuned I will soon be posting a 'How to' on tips for working with this type of yarn as it is extremely different due to its stretchability.

As always, your comments are very appreciated.


Copyright 2009 Plastique Recreations. All rights reserved.

Friday, July 10, 2009

Have Fun with Plarn (Plastic Yarn)

Yes, as lame as it may sound - any age can have fun making Plarn (plastic yarn)!!!

Let's face it, plastic bags are all around us. You go shopping and everything you buy is put in some kind of a plastic bag.
I ask you – what normally would you do with a plastic bag? Place in a bag keeper, drawer, cabinet, etc. and use to line a trash container, line the kitty litter box, put food scrapings in (I typically use a can if it is available), etc.. All completely reasonable good uses for plastic bags.

What should NOT be done?? The ultimate ‘no no’ - throwing it away.


Recycling doesn’t have to be a chore. It can be used as an opportunity to connect with your community, educate kids and students on the importance of recycling, and above all, come together as a family.

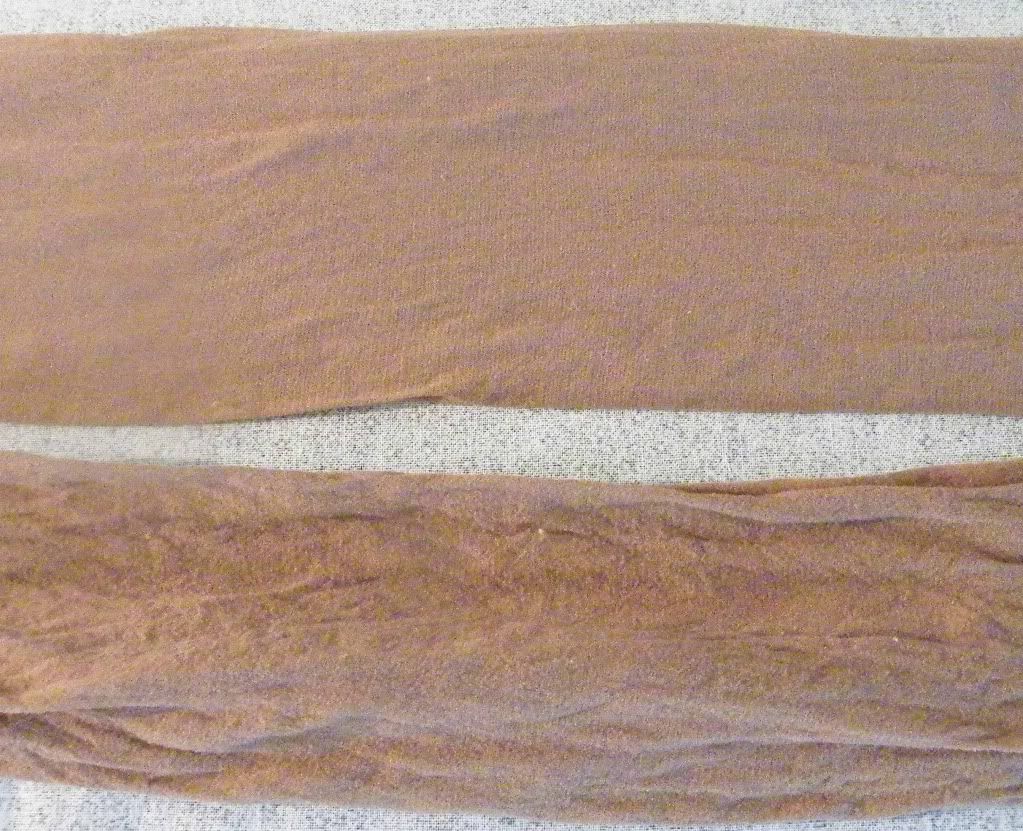
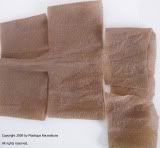
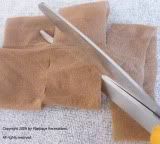
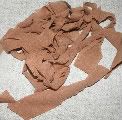
Here is an example - I teach a recycle crochet/knit class at a local senior citizen center and am amazed at how much fun both the ladies and men have cutting the strips and looping them together. I can't lay the plastic bags out on the table fast enough. That hour goes by so quickly.


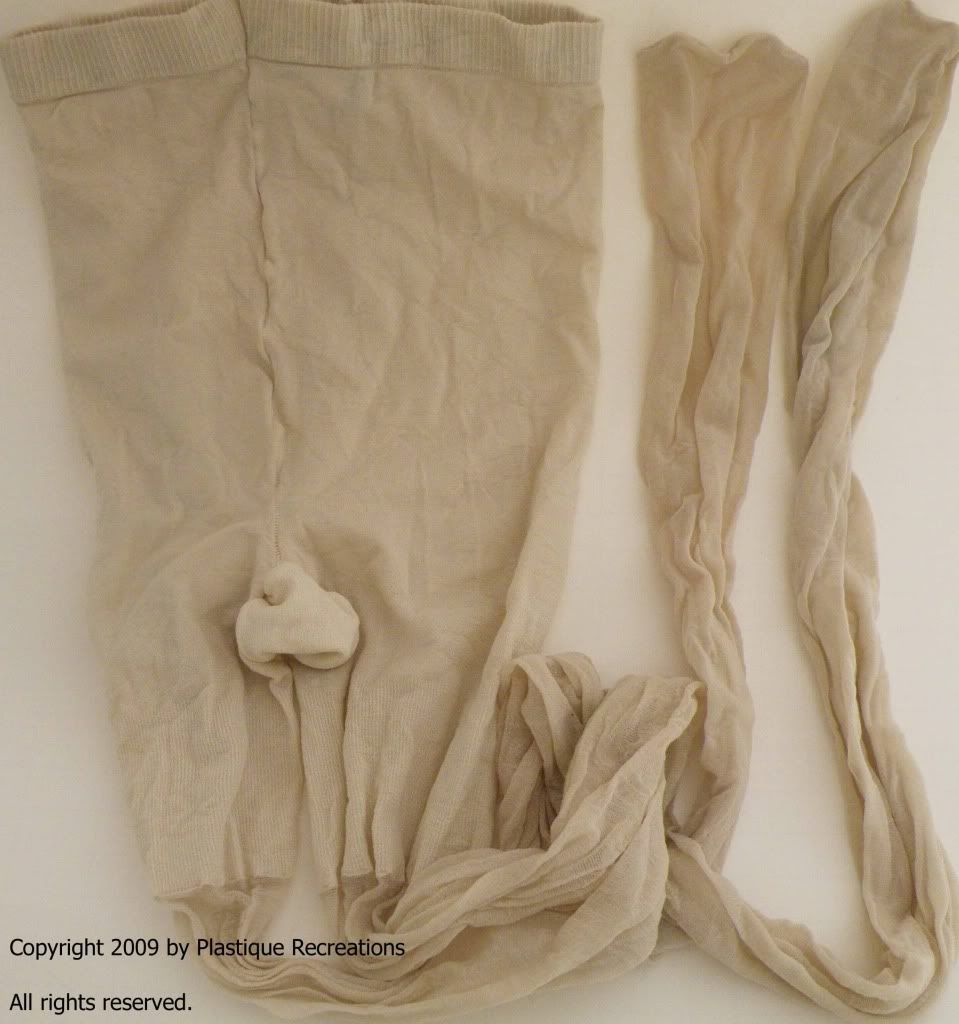
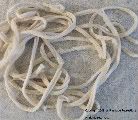
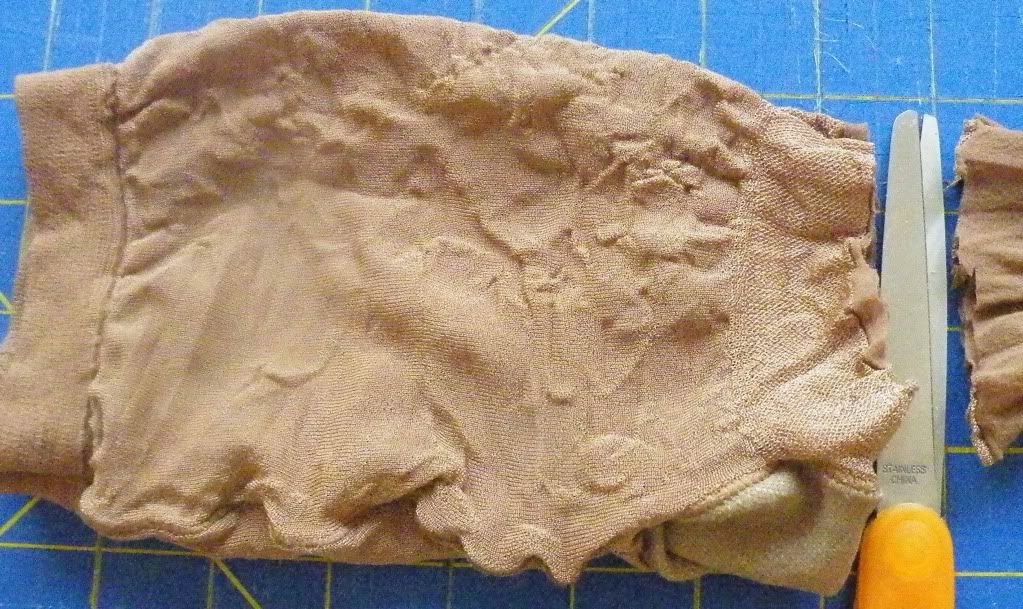
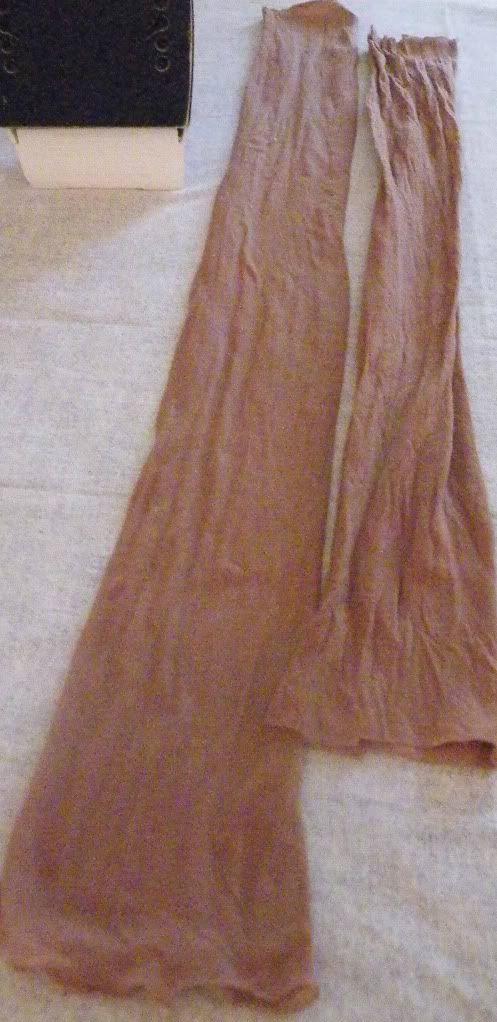
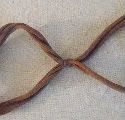
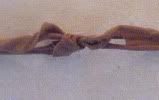
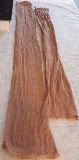
Cutting and Stripping Tutorials are available on my blog.
No excuses - there is no time like the present to start having fun!!!


Thursday, June 18, 2009

Pics of Stitch 'n Pitch Raffle Prizes

I should have provided these pictures of the Stitch 'n Pitch Raffle prizes when I announced the winners but just didn't think about it at the time - quite honestly, I was more excited about announcing the winners.

This is the Handmade Tote made from Plarn (plastic yarn) Rose will be receiving:


Measured in the middle from top to bottom=22"

Laid flat, the bag in the middle measures just under=13" across

The strap itself measures from one end to another=241/2"


This is the set of 3 CD Plarn Baskets Charlotte will be receiving:


Large basket measures 51/2" from top to bottom

Medium basket measures 41/2" from top to bottom

Small basket measures 3" from top to bottom

p.s. I did receive a response from Charlotte who was so excited about winning the baskets because she never wins anything. I feel ya, Charlotte - I never win anything myself which is why this raffle was so rewarding for me.

Congratulations again to both ladies and thank you to all for entering. I do see myself having another won later this year.

Stay tuned!!!!

Sunday, June 14, 2009

Winners of the Plastique Recreations Stitch 'n Pitch Upcycle/Recycle Raffle

I am so excited to announce that the Plastique Recreations Stitch 'n Pitch Upcycle/Recycle Raffle has 2 winners and without further delay, they are:

Rose and Charlotte

Huge congratulations to both of you for entering my raffle!!!!!!!!!!!!!!

I will be sending you a congratulations email requesting the address in which you would like to receive your prize.

In the event you're wondering why there are 2 winners - I assumed my son knew he would be drawing only 1 email from the basket. Well, he got 'draw happy' and had already pulled out a 2nd email before I realized it to stop him.

Thank you for all the kind emails I received. Please let me know if you are interested in seeing anything special or unique made from plarn. I will be glad to whip something up for you to see.

BTW - Don't forget >> you can still receive a free gift just by participating in my 'One Less' Campaign. All the details are spelled out on my blog.

Important Note - This raffle was one way for me to bring awareness to the importance of recycling.