Showing posts with label eco friendly. Show all posts

Tuesday, November 23, 2010

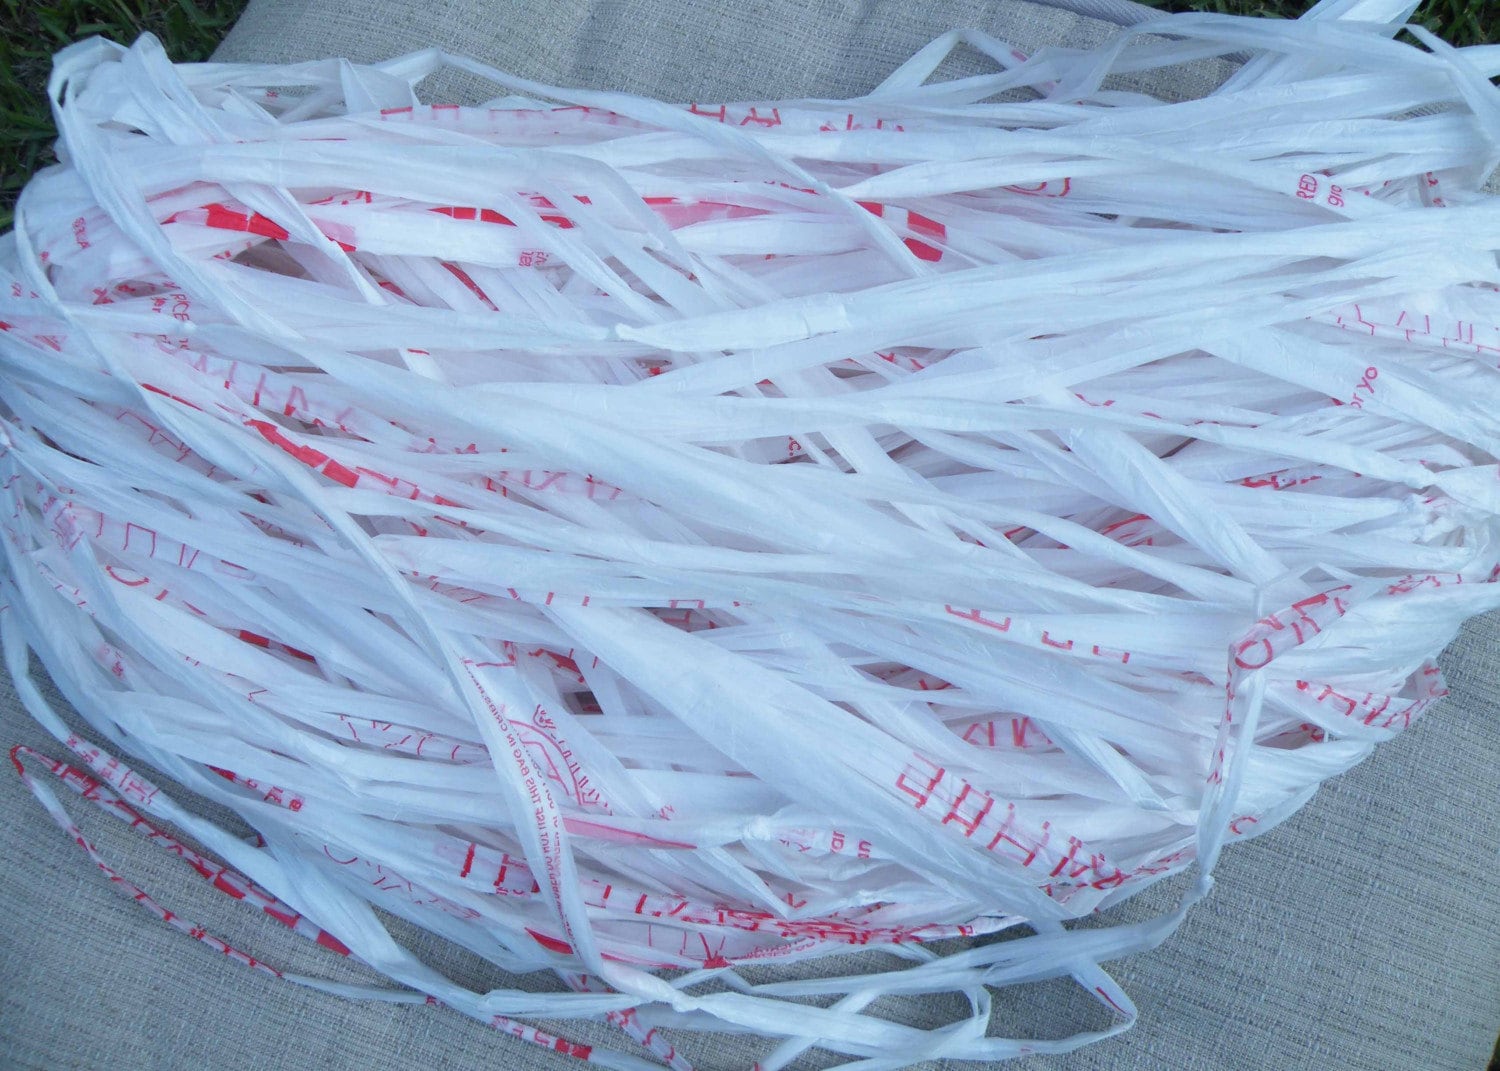
Plastic Bag Yarn aka Plarn


Move Over Yarn and Make Room For Plarn!!!

'Plarn' ..  it is a commonly used word heard quite a bit in the crafting community.    You can find write-ups and tutorials about it on various blogs and websites as well as in YouTube.

What exactly is Plarn?  It is a very creative way to recycle plastic bags you bring home from the grocery store, retail stores, and even fast food restaurants.  

The word 'Plarn' is derived from 2 words combined:  


[Pl (plastic) + Arn (yarn) =

Plarn]  . 

Let's go one step further - Now that you know what 'Plarn' is, how do you turn the plastic bag into plastic yarn? 

The 2 commonly used methods are:
2) Single (Continuous) Strand Cutting Method

The Looping Method is a fun activity to do as a family or the next time you hear 'Mom, I'm bored, there's nothing to do...').    You can have lots of fun looping plastic in a group setting such as church, at school or at work on lunch.  Heck, this is a great way to make the time go faster while waiting at the dentist or dr's office instead of reading 2 year old magazines.  

Plarn is very easy to use in both knitting and crocheting and is also visually appealing.  

Here are just a few of the different types of plarn you will find available in the Plastique Plarn Shop:


Made from Marsh Supermarket plastic bags


Made from Publix Grocery Store plastic bags

Made with Dollar General plastic bags

or go crazy and mix it up with VHS tape:

Mint Chocolate Chip which is plied VHS tape & WalMart produce plastic bags


If you are new to using plastic yarn, I hope this information is helpful.   

I welcome any comments or questions via this post or send me a private message at plastiquerecreations@yahoo.com.


Saturday, November 20, 2010

Plastic Yarn Preparation

I can't believe the overwhelming number of responses received and still receiving for the C-PAL.  It really is exciting to hear from both crocheters and non-crocheters... 

Let me take this opportunity to address a few questions from the individuals not quite ready to take the plunge.  


Most are concerned with ....  where to begin / what to do first?   

For those that have never tried using plastic bag yarn (aka plarn), I have outlined below some helpful hints and tips:  


1) Where to find plastic bags:   Majority of the grocery stores (e.g. WalMart, Kroger, Winn Dixie, Publix, etc.) typically have a recycle container located at the front entrance.  You should have no problem finding an ample supply of plastic bags in the container.  The recycle containers are either a cardboard boxes (with or without a lid) or something fancier as a hard plastic green colored container with a slot on the front for depositing.   


For this type of container, there should be a key turn on the side. Just turn the key, open it in front and choose from what's in there.   The recycle container could also be located in the checkout area.    If that's the case,  I suggest going to the Customer Service counter and letting the manager know what you're doing and make sure they have no objections.  I have yet to be told no  (but, I always have an example of a plarn item on me so I show them what I make with the plastic bags and the fascination puts them into a trance).  Also, be prepared for the stares and questions.  


2) RECOMMENDATION: Whether you choose to pick through the recycle container at the store or wait until you get home - I strongly urge, recommend, suggest you wear some form of hand protection - (e.g. playtex gloves, etc.). Over the years, I have discovered that people also use plastic bags for various other things (to be specific, dog poop) and they'll put those nasty plastic bags in with the other plastic bags. And believe me I have come across much worst than dog poop ..


3) Finding what you want:  There are many various types of plastic bags but amongst the popular are the t-shirt style most grocery stores use
and shiny merchandise/retain store bags .
 
If you're new to crafting with plastic yarn, I strongly recommend choosing the t-shirt bag as these are easier to work with.  The retail bag has a tendency to resist the crochet hook. 


4) Once you've picked the plastic bags you will be using for this project it's time to make plastic yarn.  You can access the tutorials on how to make plastic yarn on my blog.  The 2 creative ways are: 1) double-strand method (cutting the plastic bag into loops and looping the strips together) or 2) continuous strand method (making 1 long strand).   There are also other sites on the internet that also offers tutorials including YouTube.

As I indicated in my previous post, I recommend that a practice swatch be made prior to beginning the project because:
Not all plastic is made the same.  When using plarn, achieving a desired size or gauge is dependent on texture, thickness and strip width of the plastic yarn. 

Hopefully you will find this information helpful as you prepare for the C-PAL.  By all means please leave me any comments or questions that you might have.  Feel free to email me privately at plastiquerecreations@yahoo.com.

Let the count down begin - 7 days remaining

Sunday, November 14, 2010

Crochet - Plarn Along

Let me be the first to invite you to participate in Plastique Recreations first

Crochet-Plarn Along (C-PAL for short)

Before going any further I don't want to presume that everyone knows what a 'crochet-along' is let alone what 'plarn' is. 

What is a Crochet-Along?  
An online virtual event where crocheters get together and work on a particular pattern together.  It is also an opportunity to share experiences, offer suggestions, and give helpful tips/hints to each other.  

What is plarn?  It is a creative way to reuse plastic bags by turning it into yarn.  [Plastic (pla) + Yarn (arn) = Plarn]

This C-PAL is being offered to give any yarncrafter who has always wanted to crochet with plastic yarn, but didn't know where to start, the opportunity.

About Me - My name is Teresa and I have been crocheting for 41 years.  I celebrated my 30th wedding anniversary in August of this year and have 3 fantastic kids.  My first experience with crocheting with plastic bags was merely by accident about 15 years ago.  I was contracted to make an item and had just enough yarn for the project but not enough to make a practice swatch.  I remembered looking around and found plastic bags tucked away in a drawer.  I figured out how to cut the strips into something that would resemble yarn.  I was so intrigued on the texture and appearance of the swatch I ended up making the entire item with the plastic yarn.  Needless to say, so did my client and that's what she ended up paying me for.  I have perfected my cutting technique over the years and have preferred plastic yarn ever since.   

Who is invited to participate in the C-PAL?  Anyone and Everyone.  Don't keep this a secret.  Help me spread the word.  Tell everyone you know that crochets -blog about it... twitter about it... facebook about it ...myspace about it...  and any other media venue you can think of.


The skill level for this C-PAL is 'Easy' so everyone from novice to seasoned can join in the fun! 

What is the project for the 1st C-PAL?  One of Plastique Recreation's original designs, the Wrap & Go Checkbook/Wallet Organizer.   
S&S Food and Home Depot plastic bag yarn
ACE Hardware and Red newspaper sleeve plastic bag yarn

Top pic - Taco Bell & Purple newspaper sleeve plastic bag yarn
Bottom pic - Lowe's and Dollar General plastic bag yarn


Why was this chosen as the first project?  Because of  the overwhelming number of requests received for this pattern and because it is 'EASY' for the 1st P-CAL. 


When will the C-PAL start?  It will start on Sunday, November 28th.

Where and When will the pattern instructions be delivered?  The first installment of pattern instructions will be posted here on Sunday, Nov 28th; 2nd installment of pattern instructions will follow on Thursday, Dec 2nd; and the 3rd/final installment of pattern instructions on Sunday, Dec 5th.

How does it work? Once the pattern instructions are posted on  11/28, 12/2 & 12/5, I will also update the following medias:
  • Plastique Recreation's facebook (www.facebook.com/plastiqrecreat) page each time with the blog link.  Facebook is a excellent interactive tool that will be of real benefit for anyone that wants to chat real time. For the record - you DO NOT have to friend me on facebook to participate. My blog will be the primary point of communication.  However, you do have to friend me to participate in the real time interactive chat.
  • Ravelry's 'From Trash to Treasures/Crochet-Plarn Along' topic thread.

I encourage anyone participating to leave comment posts for suggestions, questions and progress pictures on any of the medias - blog, facebook and Ravelry.  However, the best place for it to be is on the blog.  If for any other reason but for retention. 


Why is this starting on 11/28?Firstly) from now until the 28th, most of us will be pre-occupied with Thanksgiving activities.
Secondly) 11/28 is my birthday and I will be turning 50 this year.  The gift of giving is the best gift of all to receive.


Why is the C-PAL only lasting one week because normally they last much longer?  Christmas is just around the corner and after you make one for yourself, you'll be addicted and realize this will make the perfect gift.   Thus, giving you plenty of time to make up as many as you can in time for Christmas.

When does the C-PAL come to an end and how long will the pattern be available?  There is no 'official' end date.  Pattern instructions will be accessible on my blog and I will continue to make myself available to answer any questions via the blog or facebook for past, present and future C-PALs that I am planning.  Continue to crochet at your own pace and at your leisure. 


I really can't think of any other questions. I tried to think of anything someone might ask. If I missed anything, don't hesitate to leave a comment post. 

I hope you are as excited about participating in my 1st C-PAL as I am hosting it.

Please let me know if you have any comments or questions. Feel free to email me at http://www.blogger.com/.


Now on to pattern details for those who want to participate -

Plarn and other materials needed:
Important thing to remember about using plastic yarn:

Not all plastic is made the same.  When using plarn, achieving the desired size or gauge is dependent on the texture, thickness and strip width of the plastic yarn. 
  • Plastic Yarn - 20 standard size plastic bags for each color.  This really is more than enough.  Everyone crochets differently (i.e. tight, loose) so this is to ensure you don't run short.
  • Crochet Hook:  size H
  • Craft Needle

Other Details:
FINISHED SIZE: Width-7 1/2"; Height-5" Gauge Info:  Typically, I don't worry much about the gauge.  However, I do recommend it for this project if you want to ensure the Organizer is a specific width/height that you want it to be. 

GAUGE: 5 hdc = 1”; 3 rows = 1 ¼”


Sunday, October 31, 2010

Pop Tab Flower Keychain Pattern

I would have never thought in a million years that I would enjoy crocheting different things with pop tabs.

As a recycle artisian, not much gets thrown away. It is just routine that before something is thrown away, anything that can be salvaged is removed from the item (e.g. pop tabs from soda cans, etc.) then placed in individual containers. From that point the stash continues to grow until I'm struck with a creative thought. Until then, I just keep removing and stashing.

One day I noticed my stash of pop tabs was increasingly growing. So I got out the plastic yarn and decided to make a flower. I like flowers. I've seen in Etsy and on other sites where various crafters used the pop tab for the petals. I wanted to be different so instead I used the pop tab as the center instead of the typical adjustable ring method to crochet in the round.

Below is my Pop Tab Flower Keychain pattern:
SKILL LEVEL: Easy
MATERIALS:
· Crochet Hook – Size F and G
· Pop Tab (any size)
· Craft needle for attaching handles and for weaving in ends
· Key Ring
· Plastic Yarn - Main Color (MC): 1 plastic bag / Contrasting Color (CC): 1 plastic bag

Round 1: With F hook and CC, join with sl st in pop tab and sc completely around pop tab (14 sts needed for 7 petals on 1st layer. Note: Make sure you end up with an even number of sts. This determines the # of petals.) Join with a sl st to 1st sc.
Round 2: With MC in flo - for each petal around – *in same st make a sc, hdc, sc, sl st in next st. *Repeat around. Join with a sl st to 1st sc.
Round 3: With G hook and CC in blo of Round 1 sts, for each petal around - *in same st make a hdc, dc, tr,dc, hdc, sl st in next st. *Repeat around. Join with a sl st in a st behind the 1st hdc made. Still working behind the petals, sl st over to tr st, *ch 3, sl st in next tr st. *Repeat around. Join with a sl st to 1st sl st made.
Round 4: With MC and in each ch sp, make an hdc, 2 dc, 2 tr, 3 dc, hdc. (Note: Add more tr sts for height. Add more dc sts for fullness). Join with a sl st to 1st hdc. Fasten off, weave in all ends.
With G hook and both MC and CC, sl st in any st in between round 3 and 4, ch 10 or desired length of key chain. Working behind the ch place the key ring in front of plarn then sl st in the last ch made. (The key ring is now part of the ch) Sl st around the key ring to reinforce strength then sl st behind each ch of the keychain across to 1st sl st made. Join with a sl st to 1st sl st. Fasten off, weave in ends.
Let me know if you run into any trouble making this and I'll talk you through it.

ENJOY!!!!
This pattern is for your personal use only. This pattern may not be sold, published, reproduced-mechanically or electronically, or by any other means, including photocopying from any website(s) or electronic mailing lists, etc… Please do not offer, sell or distribute this pattern in any way to anyone else.

Thanks for visitng - come back soon as I'll be showing off more pop tab designs.

Thursday, August 5, 2010

PR Grab & Go© Plarn Wristlet

This pattern is for your personal use only. This pattern may not be sold, published, reproduced-mechanically or electronically, or by any other means, including photocopying from any website(s) or electronic mailing lists, etc… Please do not offer, sell or distribute this pattern in any way to anyone else.


Here is a crochet pattern to a plarn wristlet that I designed to help me keep stuff inside of my purse better organized - making my comb, cell phone and checkbook more accessible. I also wanted something that I use as a wallet for quick trips into the store. Believe it or not, this did the trick!!

Skill Level: Easy
Measurements: Width: 6.75"; Height: 4.25"
Materials Needed:

Please read through the following information before beginning:

  • To make a color change - pull the new color through instead of the old color when completing the st. Place the tail of the old color behind your work to crochet over it when making the next couple of stitches with the new color. This will save you time later when weaving in your ends.
  • The ‘ch’ at the beginning of the round is not the first st.
  • When using plarn, it’s a good idea to stretch your work after every couple of rows. This will give you a more realistic view of what you have completed up to that point.
  • Plastic in general is susceptible to ripping/tearing due to its very nature. So when weaving in ends or sewing stitches together, it is a good idea to maneuver your craft needle in between stitches or use the open spaces in between stitches to avoid splitting the plastic yarn.

Row 1: With main color, ch 22, hdc in 2nd ch from hook and across.

Row 2-14 (or desired height): In blo, hdc in each st across. Fasten off, weave in ends.

Working along the sides with contrasting color, *join with sl st at corner of end row, sc across. Fasten off, leaving long enough tail for stitching. *Repeat for other side.

Fold in half lengthwise with wrong side out, sew sides together with tail. Weave in all ends. Pull pouch inside out, being sure to poke out corners.

Round 1: Attach contrasting color in a corner stitch of opening, in blo hdc around.

Round 2: In blo, hdc in each st up to the 1 st from the middle, ch 3, skip the 2 middle sts (wristlet hole), hdc in next st and around to same spot on other side, ch 30 (less if you don't want a handle or more if you want a bigger handle), skip the 2 middle sts, hdc around. Join with sl st in 1st hdc. Fasten off, weave in ends.

Round 3: With main color, in blo sc in each st around except sl st in each ch of wristlet hole and handle. Fasten off, weave in ends.


Enjoy!!!


Copyright © 2010 Plastique Recreations
Designer, Teresa Wooley
Email: plastiquerecreations@yahoo.com

Saturday, August 15, 2009

'Protect My Nails' Scrubbie Pattern with hosiery yarn


Sharing with everyone my harn (hosiery yarn) scrubbie pattern I designed. Harn scrubbies are absolutely awesome. I have made scrubbies out of just about every type of fiber and never satisfied. You will love your harn scrubbie. I created this particular crochet pattern, 'Protect My Nails' to protect my nails while doing household chores.

**The pattern is plarn (plastic yarn); tarn (t-shirt yarn) and fiber friendly.**

Supplies Needed (makes 1 scrubbie):
Size G Hook or hook of choice.
Hosiery yarn (approx 2 pairs)

Make 2 panels.

Chain (ch) 13 or number of chains needed to measure across all 4 fingers pressed together.

Row 1: Half double crochet (hdc) across to end, ch2 turn.

Row 2: Hdc in back loop (bl) only across to end, ch2 turn.
Repeat Row 2 until panel measures from tip of fingers to top of hand or desired length. Fasten off and weave in ends.

With wrong sides together at lower corner (right or left, you choose) single crochet (sc) through both panels in corner stitch and in each stitch across to next corner. Make 3 sc in corner and a sc in each stitch across to next corner. Make 3 sc in corner and a sc in each stitch across to opposite lower corner.

Fasten off and weave in all ends. It's ready to use when you are.

Copyright 2009 Plastique Recreations. All rights reserved.

Wednesday, July 29, 2009

'How To' Make Hosiery (pantyhose) Yarn aka Harn


I held an office job for many years and when I discovered a run in my pantyhose (after cursing) it immediately went into a basket. When I had enough to work with, they were transformed/recreated into something useful.

Hence, achieving 'One Less' in the landfill.

Not really sure what you would call yarn made out of hosiery. Plastic yarn is called 'plarn' and t-shirt yarn is called 'tarn' so maybe it makes the most sense to call hosiery yarn 'harn'???

Here is my tutorial for processing hosiery (pantyhose) into yarn:

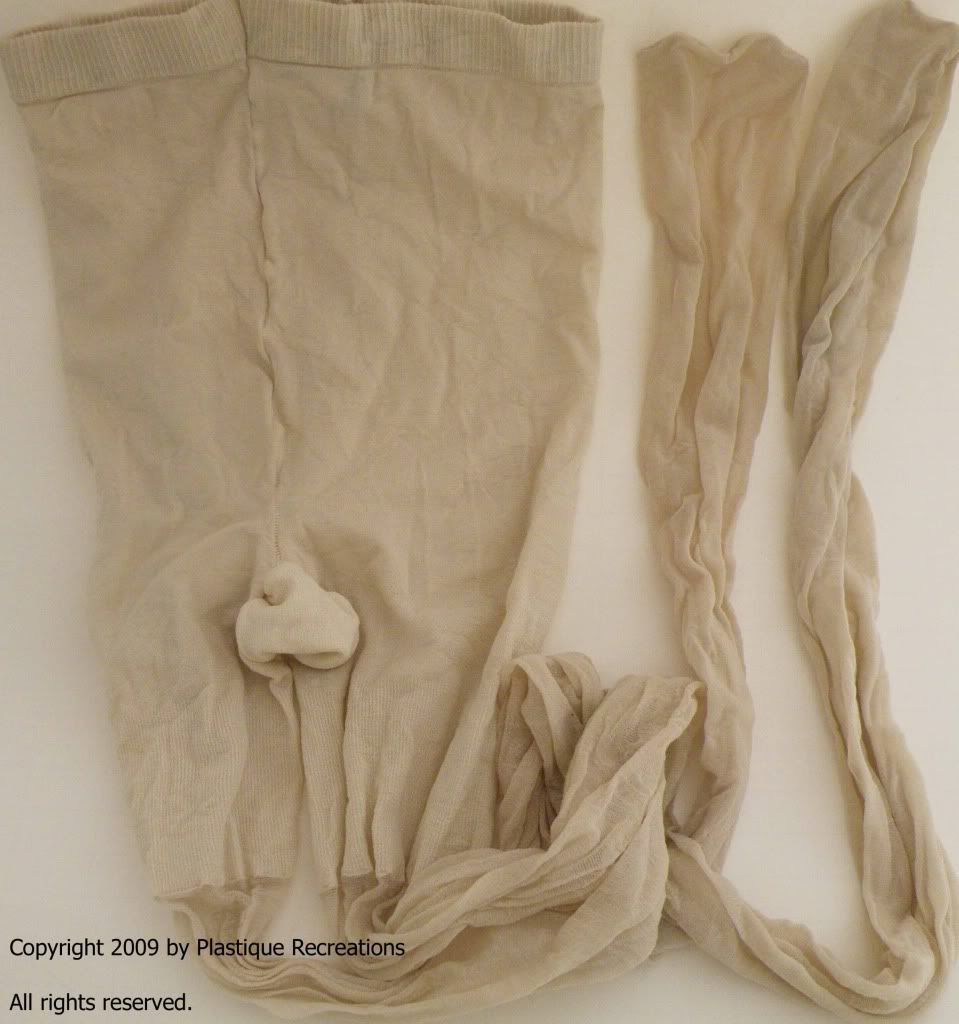
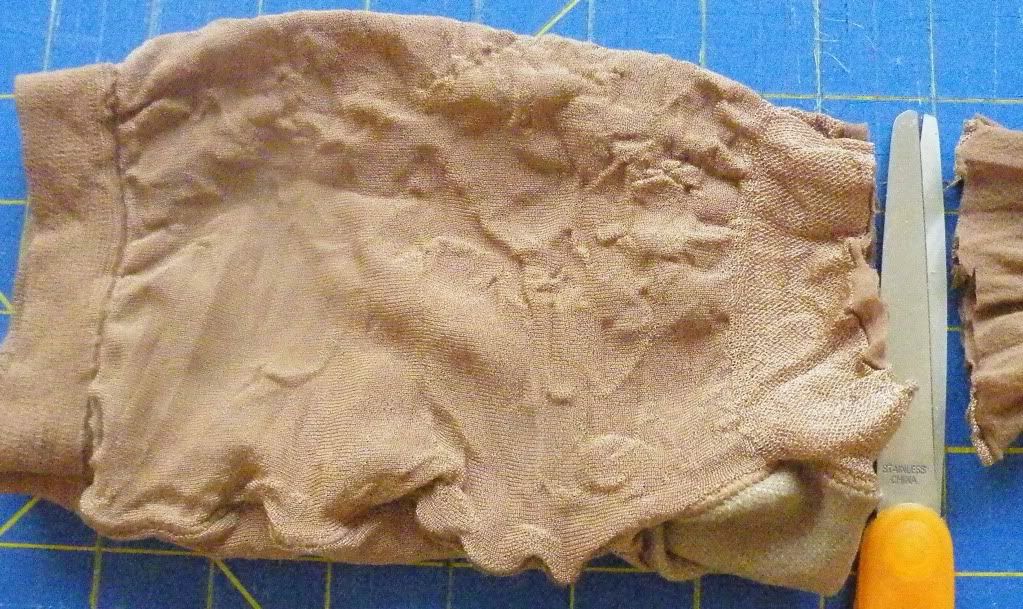
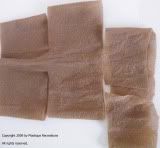
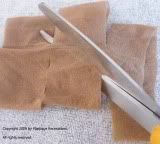
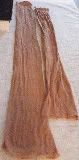
Lay the pantyhose out on a cutting surface. Fold the panty section in half. Cut the panty off from the legs at the seam.


Special Note: Pantyhose is a very user-friendly, light weight material making it easy to cut through multiple layers. I've not had any difficulty lining up seems.

Lay each leg on top the other, even up toe and cut off about 1/2" below seam.


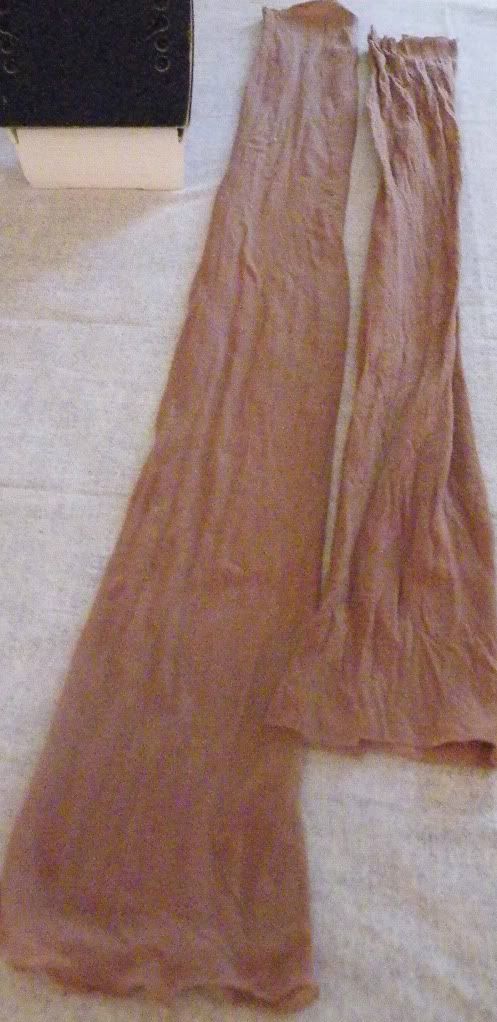
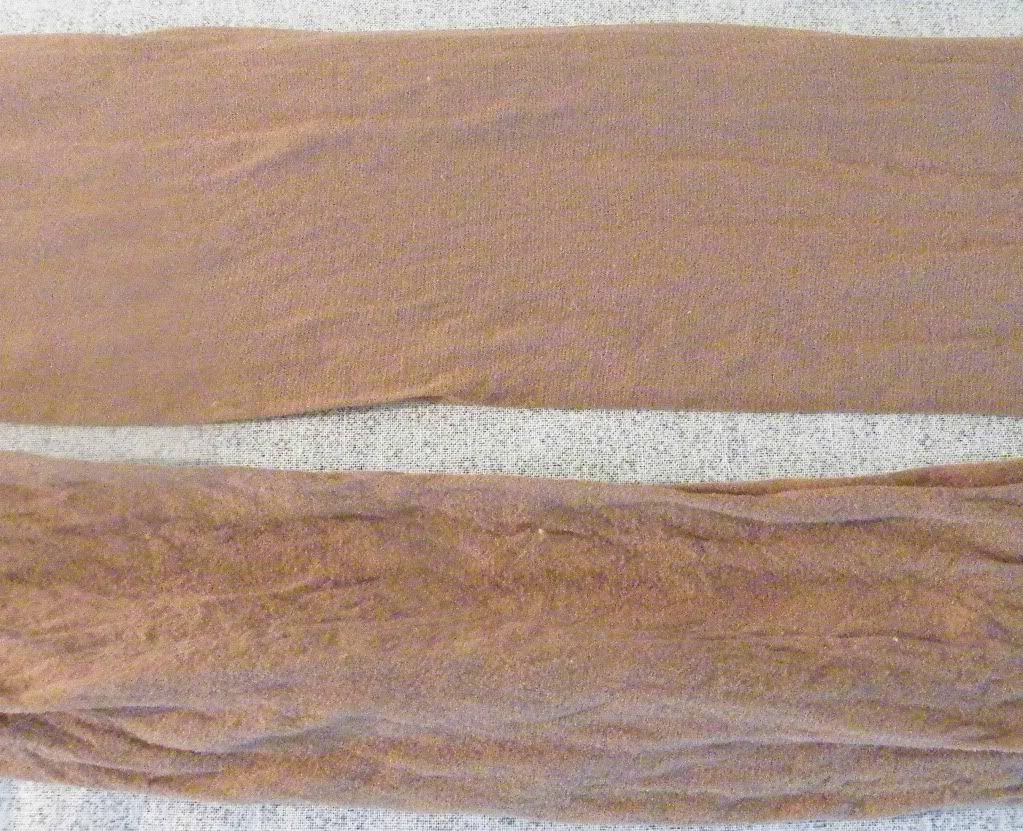
You now have something that looks like a tube with openings on each end. Lay these out on your ironing board and iron each leg. A polyester setting works perfect. (FYI - This is the same setting I use when fusing plastic, if that helps any.) Ironing the legs will stretch them to their full potential which makes cutting alot easier. You can see the difference, it's very obvious:


Cutting Steps:

I found the easiest way to cut hosiery into yarn is to use the 'Continuous (Single-Strand) Method: http://plastiqrecreation.blogspot.com/2009/04/continuous-single-strand-strip-cutting.html. Hosiery yarn is very similar to t-shirt yarn.

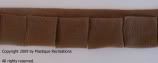
Lay the ironed tube on cutting surface and fold the bottom up to within about 1/2" from the top. Begin cutting strips starting from the bottom fold up to 1st fold. This leaves that 1/2" area to top fold uncut (what I call the spine). (NOTE: The width of the strips are determined by your project needs). A typical width is 1 to 11/2" wide.


Because this is such light weight material, I would suggest running a afghan hook, knitting needle, etc. through the middle of the spine separating the layers. It'll also might help if you straighten out each strip.

To make a single strip/continuous strand, place your scissors at one open end of the tube, cut the bottom off of the first section just under the spine.


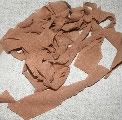
To cut next strip, angle scissors upward from the previous cut section just under the spine to the top of the next section. Repeat this until you have reached opposite end of tube. Once you have reached the end, you should have one continuous strand.


Once you have reached the end, you should have one continuous strand.


Just like t-shirt yarn, to make a curl - take a section of the srip in each hand and pull. It'll curl up right before your eyes. Then move on to the next section and repeat until you have reached the end of the strip.
I have tried other method which I don't recommend. For example, the double-strand method: http://plastiqrecreation.blogspot.com/2009/04/double-strand-cutting-and-connecting.html.


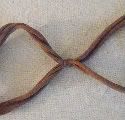
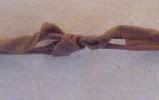
Cut two strips (they would be very small) then loop together. As you can see, the knot isn't very small and would be very difficult to hide.


You could also cut two long strips and make a small cut at the top of each then loop together. As you can see, they tear easily and again would be very difficult to hide.


Stay tuned I will soon be posting a 'How to' on tips for working with this type of yarn as it is extremely different due to its stretchability.

As always, your comments are very appreciated.


Copyright 2009 Plastique Recreations. All rights reserved.

Tuesday, April 28, 2009

How to Make Plastic Yarn (Continuous / Single-Strand Strip Cutting Method)

There are multiple strip methods you can use to make and connect plarn (plastic yarn) strips. The 3 methods I'm aware of are - 1) Double-Strand; 2) Continuous (Single-Strand) Strip and 3) Connecting Strip.


Tip: Any of the strip methods can also be used with fabric; t-shirts, etc..


Tutorial for cutting a Continuous (Single-Strand) Strip:Lay the bag out flat, straightening out the straps. Fold bag in half (folding bottom up to be even with the top) matching up the handles then a couple more times for easier cutting.


Cut straps off right at the base of the straps and cut off bottom seam of bag. Just a sliver is all that is needed.


Put your hand through the middle of the bag to pull it apart and lay flat as a tube. Fold this tube to within 1 inch from the top (I call the main fold the spine).


Continue the fold multiple times until your tube is small enough to make one cut. You’ll cut from the bottom to the top of the initial fold – not through the spine. Determining the width of you’re the strip is based on the needs your for your pattern. The rule of thumb is not less than 1”, 1 1/2 to 2” pieces are typical cut sizes.


Straighten out the strips – it almost looks like tentacles. Here comes the fun part – separate the strips by separating it at the spine. You can either lay it out on a flat surface or use one of your arms (I use the arm way which is why I'm suggesting it). To use your arm, take one hand at the beginning of the spine and separate each half.


Whether you lay it out on a flat surface or use your arm - to begin cutting place your scissors on the bottom half of the spine, angle your scissors in an upward motion to the next section over and cut. Continue cutting until you reach the other end. You should have a pile of one single continuous strip.


Making the Ball –
The easiest way I have found to make a ball is put your pointer and middle fingers together. Place the end of the strip between the fingers and begin wrapping the strips around both fingers about 5 times. Then pull off the fingers and begin wrapping the strips around it. Before you know it, your ball begins to take shape.


Copyright 2009 Plastique Recreations. All rights reserved.

How to Make Plastic Yarn (Double-Strand Cutting and Connecting Tutorial)

There are multiple strip methods you can use to make and connect plarn (plastic yarn) strips.

The 3 methods I'm aware of are - 1) Double-Strand; 2) Continuous (Single-Strand) Strip and 3) Connecting Strip.


Tip: Any of the strip methods can also be used for fabric; pillow cases, t-shirts, etc..


Tutorial for the Double Strand Method:


Cutting Strips -
Lay the bag out flat, straightening out the straps.


Fold bag in half (folding bottom up to be even with the top) matching up the handles then a couple more times for easier cutting.


Cut straps off at the base of the straps and bottom seam. Cut off bottom seam of bag. Just a sliver is all that is needed.


Put your hand through the middle of the bag to pull it apart and lay flat as a tube. Fold the tube in half then a few more times until your tube is small enough to make one cut. The strips are cut to the size needed to meet your pattern needs. (The rule of thumb is not any less than 1”. 1 1/2 to 2” pieces are typical cut sizes.)


Connecting Strips –
I have had excellent success with this 'visual' teaching method of showing how to connect the strips: Hang 2 strips on your hand/arm


Using your opposite hand, reach through the middle of the first strip to grab the bottom of the 2nd strip and pull through. (The picture shows the same hand but I didn't have another set of hands available.)


Drop the 1st strip from your hand. (In the picture above it will be the strip in the middle.) You now have something that resembles a ‘T’.


Now take the bottom strip (In the picture above it will be the strip closest to the fingers) and lay it over the strip still sitting on your hand.


    Now grab the strip closest to the fingers (strip on bottom) with one hand and pull to form a small knot. (Reminder: Your primary objective is to avoid breaking the strip which is very easy to do if you pull too tight).


    Keep adding strips using this same method (eventually you’ll grasp the concept of connecting the strips and won’t have to use the ‘hand method’).


    Important: Here are some important tips to remember:
    · Avoid ripping the strip from pulling too tight.
    · Keep the 2-strand strip even.
    · Make the knot as small as you can. You’ll find that some strips will knot gracefully but believe me there’s always those few that will make you work for it. When this happens you just have to do a little pulling and tugging on the knot.


    Forming the Ball –The easiest way I have found to make a ball is put your pointer and middle fingers together. Place the end of the strip between the fingers and begin wrapping the strips around both fingers about 5 times. Then pull off the fingers and begin wrapping the strips around it. Before you know it, your ball begins to take shape. (Side Note: To avoid tangles, I usually start making the ball after I have 6-10 strips made, then make another 6-10 strips and wrap.)


    Copyright 2009 Plastique Recreations. All rights reserved.