Showing posts with label twooleydesigns. Show all posts

Wednesday, July 23, 2014

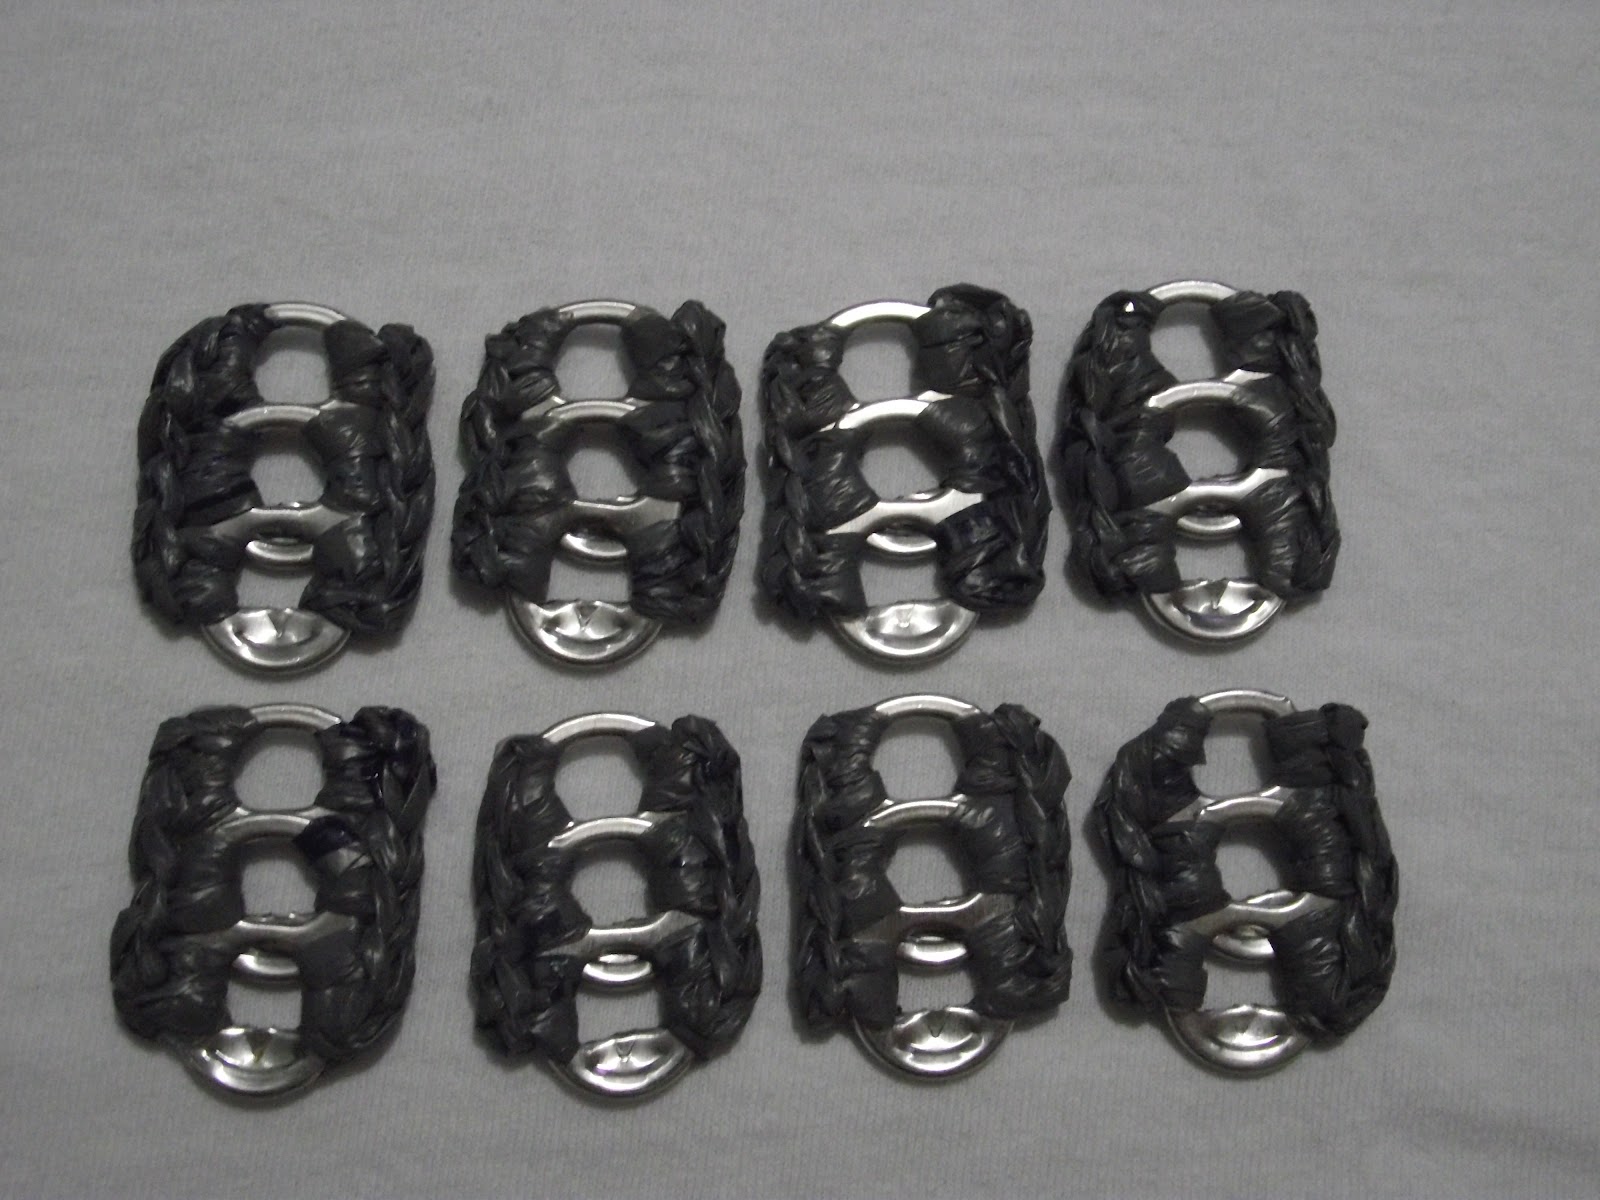
Tarn Pop Tab Bracelet - Free Crochet Pattern


For me, I'm not completely dressed unless I am wearing bracelets.  Sharing with you this simple casual bracelet design that makes up quickly.  


I was going couponing the next day and knew I would be out shopping for a long period of time. So comfort and sturdiness was imperative.  

I just happen to have left over t-shirt yarn from making this tote - 

   
Materials Needed:

  • Pop Tabs (cleaned and same size):  8 or number needed to fit around your wrist comfortably when finishe
  • T-Shirt Yarn:  Strips cut in 1/2" thin strips - 2 colors needed 
  • Crochet Hook:  Size F
  • Large Eye Sewing Needle 

For each pop tab, with one color join with slip stitch in a hole and single crochet all around the pop tab.  Join with slip stitch in first single crochet stitch.  Fasten off and weave in tail.

Begin piecing pop tabs together by placing right sides together and stitch the sides together until a complete ring has been formed.

With other color, join with slip stitch in back loop of any stitch, *chain, slip stitch in next stitch.  Repeat * around and join with slip stitch to first stitch. Fasten off and weave in tail.


Wear it proudly!!!

Feel free to contact me at plastiquerecreations@yahoo.com if you have any questions.  I would love to see your finished designs.


Thursday, March 13, 2014

Pop Tab T-Yarn Granny Square Crochet Pouch - Part 3

I apologize for the delay in posting the last part of this pattern.  I actually thought it had already been completed.  

After sewing the lining on.   Join red with a slip stitch to any stitch, single crochet in same stitch and in each stitch around with 3 single crochet stitches in each corner.  Join with a slip stitch in beginning single crochet stitch.  Fasten off and weave in your end.


Now we are ready to finish the sides: 

The sides are made with 4 pop tabs starting at the base for a total of 10 middle stitches.  The arrows in the pics below mark the middle which will be the 5th and 6th stitch that will be made in the first hole of the 3rd pop tab.  Working in the bottom of the pop tab and in back loop of pouch, count 4 stitches to the left and place pop tab with wrong side facing you, join red tarn with slip stitch and 2 single crochet stitches in same hole.  Still working in bottom of pop tab with wrong side facing you, lay a 2nd pop tab over 1st pop tab and make 2 single crochet stitches through hole of overlapped pop tabs.  Continue for 2 more pop tabs for a total of 10 single crochet stitches.  Fasten off and weave in ends.  


Lift up the row of pop tabs so the right side is facing you.  Join gray tarn with a slip stitch in 1st hole, 2 single crochet stitches in same hole and 2 single crochet stitches in each hole across.  Chain 1, turn and continue for 17 more rows or # needed to achieve even heighth.  Fasten off gray, weave in ends.  

Working in end gray rows, with red tarn join with slip stitch in end stitch and single crochet in each stitch across and 2 single crochet stitches in side of starting pop tab row.  Finish off and weave in ends.  Repeat edging on the other side.  

Flip the pouch over and repeat building the starting 4 pop tab row.

Now we're ready to sew the sides to the pouch - you are welcome to use any method you wish to...  whip stitch, slip stitch, etc..

This pouch was stiched together working on the wrong side through the back loop/front loop using a slip stitch-chain 1 pattern in each stitch across finishing with a slip stitch in last stitch.

Don't worry about turning the pouch inside out because the tarn makes the pouch very flexible/stretchable.


The Finish - 

To finish the pouch, make a round of single crochet stitches with red tarn. This round connects everything together making the pouch a whole piece.  

(optional) This row is optional.  To give it a more refined finished look, the edging is a round of reverse single crochet with the gray tarn.


A closure (e.g. snap, button, zipper, etc.) was not sewn on this pouch but feel free to use whatever closure you want.  

I have a couple of these pouches in my purchase - one is used keep my coupons in after completing my match up list.  The other pouch is used for my compact, lipstick, little hand lotion bottles, etc..   


I hope you enjoy this pattern and by all means don't hesitate to ask me any questions by emailing me at twooleydesigns@gmail.com.

Monday, May 21, 2012

Free Pop Tab Crochet Pattern - Glamour Bracelet/Cuff


I love coming up with new pop tab bracelet designs and this is one of my newest that I'm offering as a free pattern.

The neat thing about this pattern is it can be made into a bracelet or add more pop tabs to each panel and make it into a cuff.  Your choice - keep it small and dainty or go as big as you want.


Materials Needed:
  • Size F crochet hook
  • The # of standard size plastic bags or other recycled yarn of your choice will depend on whether you make a bracelet or cuff.  (For the gray bracelet, I was able to make 2 bracelets with one plastic bag.) 
  • The # of pop tabs needed will depend on whether you make a bracelet or cuff.  (For the gray bracelet, 2 pop tabs are used for each panel with 6 panels total.  For the white bracelet, 4 pop tabs are used for each panel with 6 panels total.)
  • Craft needle for stitching panels together.
Plarn Preparation:  Here is the link to making plarn for this pattern:

Recycled Yarn alternatives:  pantyhose and t-shirt yarn works great with this pattern as well.  Just cut your strips thinner than normal.


Instructions:
Attach plarn with slip stitch in hole of a pop tab, chain 1 and make a single crochet in same stitch.  Place another pop tab behind and make 2 single crochet stitches in next hole going through both pop tabs.  Continue adding pop tabs with 2 single crochet stitches in each hole.  When desired length is achieved, finish by making 2 single crochet stitches in last hole.  Fasten off, weave in ends.  Repeat the same on opposite side.


When first making the bracelet, I didn't know how many would be needed so I made up a few then stitched each one together, then made up a few more, etc..  To sew panels together, put right sides together and whip stitch on the back side.


When you have so many stitched together, place it over your wrist to see how many more panels will be needed.  There is some stretch, enough to pull bracelet over the hand when bracelet is finished. 

Finish bracelet by stitching the 2 ends together.  Then turn inside out.


One last note:  Since this is a bracelet made with pop tabs, I wanted the pop tabs to shine through. 

However, feel free to single crochet, reverse single crochet or even slip stitch around the ends of the pop tabs.    

Here are a few alternative design options:
  • Use a different color to whip stitch panels together 
  • With right side facing you, make x's across covering whip stitching.

If you have any questions, don't hesitate to contact me at plastiquerecreations@yahoo.com.

Copyright © 2012 Plastique Recreations.  This pattern is for your personal use only.  This pattern may not be sold, published, reproduced-mechanically or electronically, or by any other means, including photocopying from any website(s) or electronic mailing lists, etc  Please do not offer, sell or distribute this pattern in any way to anyone else.                                                                


Saturday, November 12, 2011

Free Plarn Pattern - Pop Tab Ring of Elegance


Personally, deciding on what piece(s) of jewelry to wear is just as important as deciding on what outfit to wear.    And, big jewelry pieces are definitely the fad right now.  We see it all the time on tv, in the magazines as well as our own day to day social settings. 

That's exactly the concept behind my newest pop/pull tab design - Pop Tab Ring of Elegance.  This ring proves that recycling can be upcycled to something beautiful.


This ring can easily be crocheted in less than 30 minutes.  This is pattern is perfect for all skill levels.  All you need to know is how to make a chain, the single crochet and reverse single crochet. 


Materials needed:
  • 8 pop/pull tabs
  • Size G crochet hook
  • 1 plastic bag of choice
  • Button or Pin or whatever you want to use for complimenting the pop tabs.    Let your creative juices flow.   Here I've used a button that I removed from an old suit jacket that was tossed in the trash.   But, really anything can be used. 
  • Craft needle

Pattern:


Ring Base - Make 2: 
Round 1:  Using the magic circle, make 8 single crochet stitches in the ring (close the ring not tightly, leave a big enough hole for the button hole to go through), slip stitch in first single crochet stitch to complete round. 

Round 2:  Chain 1 and make a single crochet in same stitch, make 2 single crochet stitches in each stitch around, slip stitch in first single crochet stitch to complete round.

Round 3: (reverse single crochet) Chain 1, now working in the opposite direction make a single crochet stitch in each stitch around and join with a slip stitch in first single crochet stitch to complete round.  Fasten off and weave in both ends.


Now for the finger piece:
Row 1:  Chain 3, single crochet in second chain from hook and in last chain, turn.

Row 2:  Chain 1, single crochet in first stitch and in next stitch.
Repeat row 2 until desired fit. 
Determine fit by placing an end on one side of finger then wrap it around ending on other side of finger.  Don't put the ends together because you want a tight fit as there is some stretch with plastic yarn.


Whip stitch the ends to the right side of a ring base.  Noticed I said 'right side' because the wrong side will be sewn to the back of the pop/pull tabs. 


On the other ring base we'll be attaching the pop/pull tabs.  Do this by stitching the right side of 4 pop/pull tabs to the wrong side like clock  hands at 12, 3, 6 and 9.  


Then sew the remaining 4 pop/pull tabs in the empty spaces between the existing pop/pull tabs.  


Don't worry about how it looks because your stitching will be hidden with the other ring base.

Now place your button on top of the same ring base poking the stitch hole through the middle circle and stitch it to the ring base.  Remember, it doesn't matter how it looks because your stitching will be hidden.  
 

You now have 2 separate finished pieces. 


To finish the ring, stitch the 2 ring bases together.  The easiest stitching method I have found is first insert your needle from behind one of the  pop/pull tabs of your choice through a stitch in round 2 to the front.  Then insert the needle in the next stitch over through the middle and out the back of the bottom ring base.  Now working on the bottom, insert the needle in next stitch over, through the middle and to the top of ring.  Repeat this completely around the ring base until both ring bases are stitched together.  You may need to repeat the stitching for a second round just for added security.


Viola - your ring is ready to wear!!!!


Non Pop/Pull Tab Idea:

This pattern works great for those that are not into pop/pull tabs yet.  Just crochet one ring base and finish it by sewing either an oversized button or smaller button to the top.  It still looks great and gives you another fun flirty upcycled jewelry piece.


I would love to see pics of rings you've made with this pattern.    Send them to me at plastiquerecreations@yahoo.com or twooleydesigns@gmail.com.   

You can also find me on Ravelry under 'crochooley'.


MOVE OVER YARN - MAKE ROOM FOR PLARN!!!!