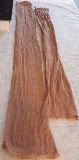
As mentioned in the last blog post, my neighbor gifted to me a big box of t-shirts. Meaning the creative juices continue to flow as I try to invent new design concepts on what to do with them. Since this box has such a variety of colors I decided to take advantage of this.
So where did the inspiration to create a pop tab granny square come from? Believe it or not I had just logged into Ravelry and was perusing through various patterns when I saw a beautiful granny square design. That's when I decided - let's see what a pop tab granny square would look like.
Let's get started -
Supplies needed:
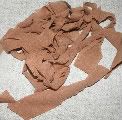
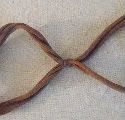
- 3 large t-shirts - one of each: pink, gray and red cut into yarn. Using my continuous strand tutorial, cut each t-shirt into 1/2" width strips.
- 153 cleaned, same size pop tabs
- scissors
- sewing needle with matching thread
- large eye craft needle
- Size G crochet hook
The pouch consists of 4 granny squares -
Each square is made up of 4 rows of 5 pop tabs = 20 + 6 pop tabs on each end = 32. Each side is made up of 2 squares that are connected in the middle with 10 pop tabs. The bottom is made up of 3 rows of 18 pop tabs
Preparation:
Pop Tab - I personally have taken a dislike to the edge piece that remains on the pop tab when it is pulled off from the can. So just a heads up that you will start to see my designs (e.g. bracelets, purses, etc.) will have this removed.
The positive: It just gives the pop tab overall a much cleaner appearance as you can see in the first pic below.
The negative: Time consuming to sit there and remove that edge piece from every pop tab. I found the best time to do this is while watching tv. Once you get started, you'll be amazed at really how many you can get done while watching a 1/2 program unless its The Big Bang Theory. That is one of my favorite shows and it's hard to do anything when you are laughing.
Here's what you want to do - using needle nose pliers, grab the left corner of the edge piece and slowly remove it from the pop tab all the way across until it is completely removed. I forgot to mention that you'll want to have a trash container/bag near by to put that edge piece in once you remove it from the pop tab.
If you decide that it's just not worth it, than I would suggest just removing the edge piece from the end row pop tabs.
If you decide that it's just not worth it, than I would suggest just removing the edge piece from the end row pop tabs.
If it doesn't come off cleanly, just grab your dollar store nail file and a few back/forth motions will file away the rough edges.

Design Notes:
Right sides are always worked together meaning the right side of the pop tab faces the right side of the piece.
Whenever possible, work tails in behind the single crochet stitches as you go to avoid weaving in ends later.
Pattern - make 4 squares:
Starting with 1st color, join with a slip stitch in first hole of first pop tab and make single crochet stitches in same hole.

Row 1: Add another pop tab behind the 1st pop tab and make 2 single crochet stitches going through both holes. Continue adding pop tabs until there is a total of 5 pop tabs (12 single crochet stitches). Chain 1, turn.

Row 2: With wrong side facing you, place pop tab in same direction as 1st row pop tabs, single crochet through first stitches and through 1st hole of pop tab that is on right side of piece. Picture below shows what the right side looks like.

Continue across in same manner as 1st row. Picture below show what the right side will look like when the 2nd row is completed.

When row is complete, open pop tab so piece lays flat. You might have to do some stretching for everything to look right and fall into place.

Row 3: Chain 1, turn. Make 2 single crochet stitches in each pop tab hole across. Chain 1, turn.

As indicated before, the pop tabs are added on the right side of piece.

Row 4: Making sure pop tabs are facing same direction, with right side of pop tab facing right side of piece, single crochet stitch through pop tab hole and 1st stitch of piece. You might need to look at the back of piece to make sure the hook is going through the correct single crochet stitch of row 3. Single crochet in same pop tab hole and 2nd stitch of row 3. Essentially, you're repeating the stitch for stitch pattern as you would normally. Repeat this across.

Row 5: When row is complete, open pop tab so piece lays flat. You might have to do some stretching for everything to look right and fall into place. Chain 1 turn. 2 single crochet stitches in each stitch across. Chain 1, turn.
Row 6: Repeat row 4. Open pop tabs and lay piece flat, stretch and pull for everything to look right and fall into place.

Sides of Square:
The sides are worked the same way as row 4. Starting at the corner, place a pop tab facing right sides together and single crochet through both holes. Overlap another pop tab and make 1 single crochet stitch through overlapped pop tabs and pop tab hole of piece. Repeat across for a total of 6 pop tabs with one single crochet stitch in each hole. Repeat on the opposite side.


.
Outside Edging:
Attach gray with a slip stitch to any pop tab hole, make a single crochet in same hole and in 2 single crochet stitches across, 5 single crochet stitches in each corner. When you reach the starting hole, make 1 more single crochet stitch and join with slip stitch to 1st single crochet made.

Repeat 3 more times so you have a total of 4 squares.
I'm currently working on Part 2 now and will have it posted in the next few days.
If you have any questions on Part 1 pattern, please email at plastiquerecreations@yahoo.com.