Monday, May 21, 2012

Free Pop Tab Crochet Pattern - Glamour Bracelet/Cuff


I love coming up with new pop tab bracelet designs and this is one of my newest that I'm offering as a free pattern.

The neat thing about this pattern is it can be made into a bracelet or add more pop tabs to each panel and make it into a cuff.  Your choice - keep it small and dainty or go as big as you want.


Materials Needed:
  • Size F crochet hook
  • The # of standard size plastic bags or other recycled yarn of your choice will depend on whether you make a bracelet or cuff.  (For the gray bracelet, I was able to make 2 bracelets with one plastic bag.) 
  • The # of pop tabs needed will depend on whether you make a bracelet or cuff.  (For the gray bracelet, 2 pop tabs are used for each panel with 6 panels total.  For the white bracelet, 4 pop tabs are used for each panel with 6 panels total.)
  • Craft needle for stitching panels together.
Plarn Preparation:  Here is the link to making plarn for this pattern:

Recycled Yarn alternatives:  pantyhose and t-shirt yarn works great with this pattern as well.  Just cut your strips thinner than normal.


Instructions:
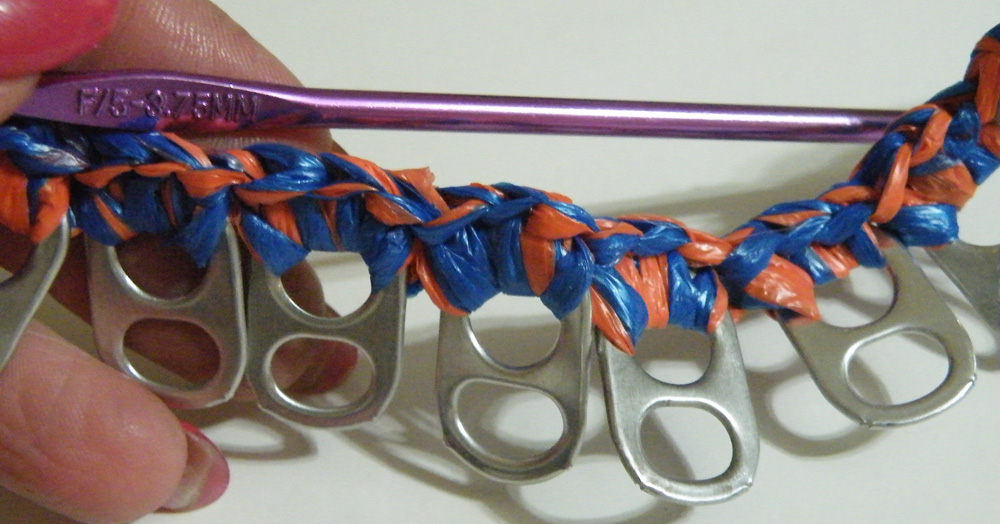
Attach plarn with slip stitch in hole of a pop tab, chain 1 and make a single crochet in same stitch.  Place another pop tab behind and make 2 single crochet stitches in next hole going through both pop tabs.  Continue adding pop tabs with 2 single crochet stitches in each hole.  When desired length is achieved, finish by making 2 single crochet stitches in last hole.  Fasten off, weave in ends.  Repeat the same on opposite side.


When first making the bracelet, I didn't know how many would be needed so I made up a few then stitched each one together, then made up a few more, etc..  To sew panels together, put right sides together and whip stitch on the back side.
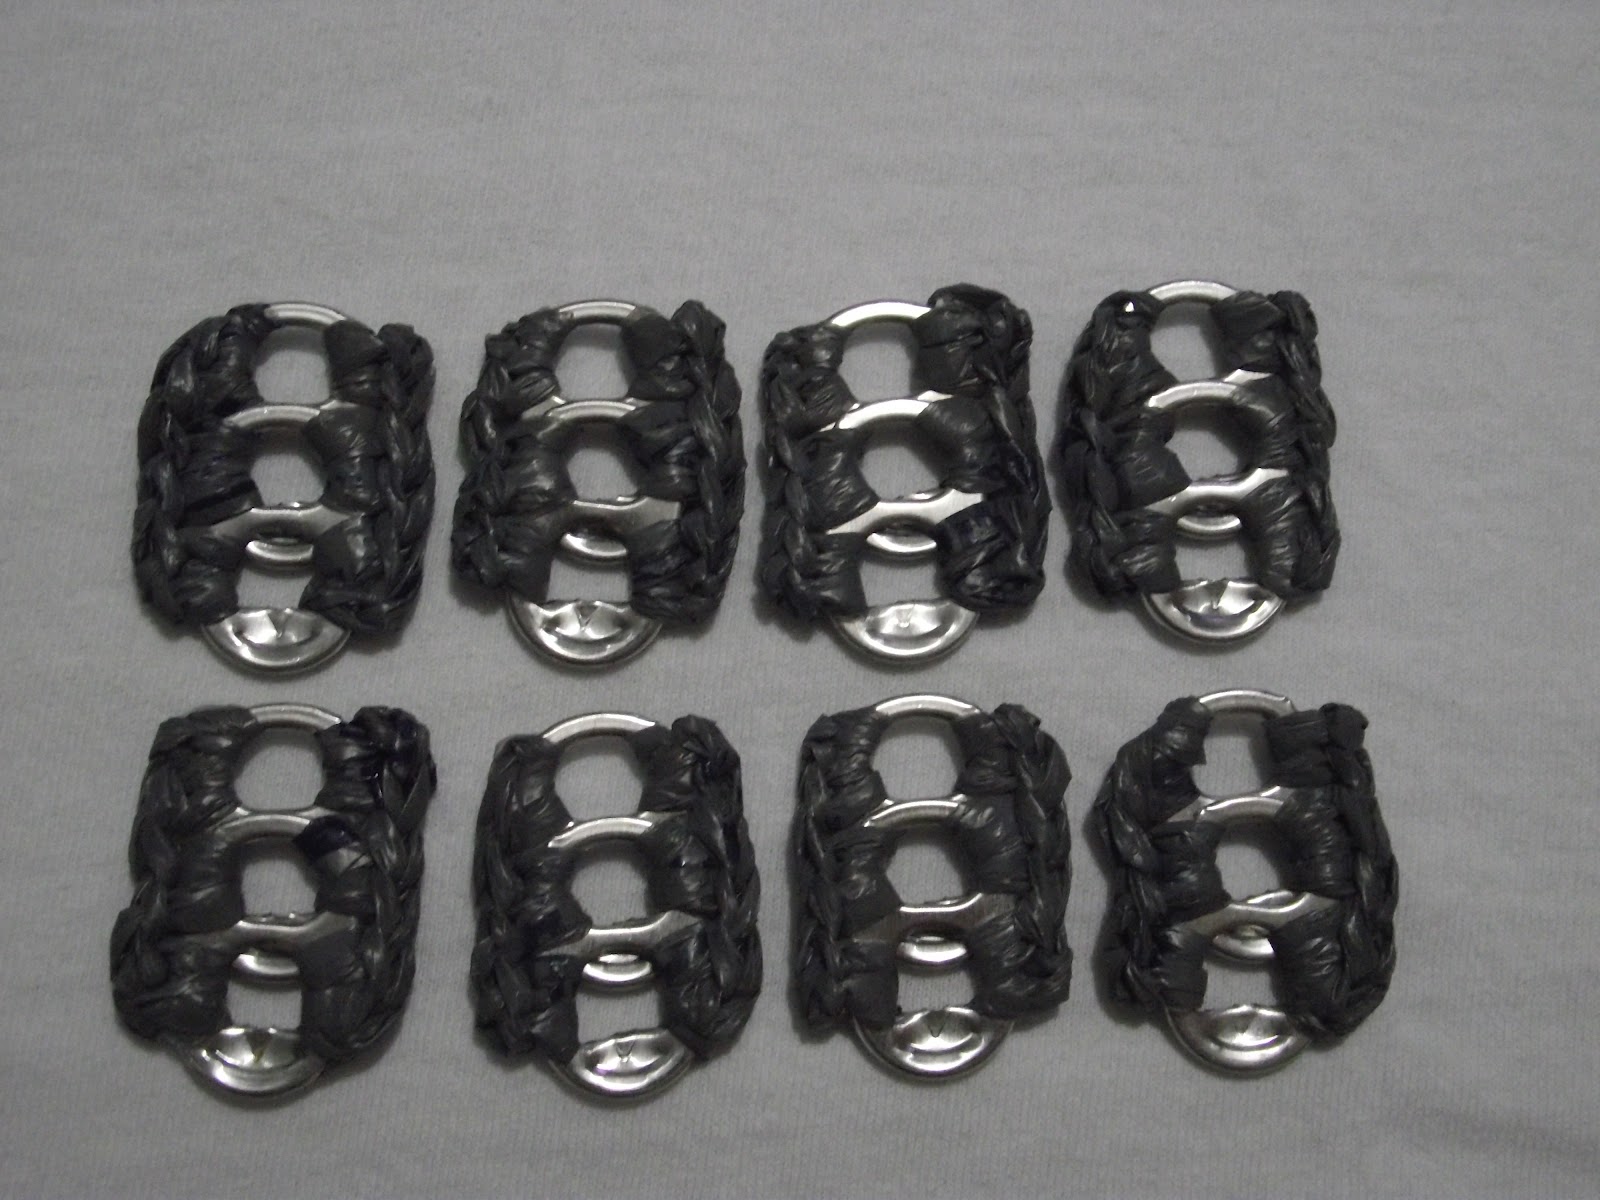

When you have so many stitched together, place it over your wrist to see how many more panels will be needed.  There is some stretch, enough to pull bracelet over the hand when bracelet is finished. 

Finish bracelet by stitching the 2 ends together.  Then turn inside out.


One last note:  Since this is a bracelet made with pop tabs, I wanted the pop tabs to shine through. 

However, feel free to single crochet, reverse single crochet or even slip stitch around the ends of the pop tabs.    

Here are a few alternative design options:
  • Use a different color to whip stitch panels together 
  • With right side facing you, make x's across covering whip stitching.

If you have any questions, don't hesitate to contact me at plastiquerecreations@yahoo.com.

Copyright © 2012 Plastique Recreations.  This pattern is for your personal use only.  This pattern may not be sold, published, reproduced-mechanically or electronically, or by any other means, including photocopying from any website(s) or electronic mailing lists, etc  Please do not offer, sell or distribute this pattern in any way to anyone else.                                                                


Saturday, April 7, 2012

Free Plarn Crochet Pattern - Plarn Bumble Bee Wristlet


I made this Little Bumble Bee Wristlet from Dollar General plastic bags and 'Thank You' black plastic bags.  The wings were made from the white part of  a JC Penny plastic bag and edged with the black plastic yarn.  I added eyes that moved to give it a more fun look.
 

SKILL LEVEL: Easy

MEASUREMENTS:  Height – 8.25”; Width – 9.25”; Big Strap – 10”, Small Strap – 4 ½”

CARE INSTRUCTIONS:  Machine wash and air dry

MATERIALS NEEDED:

Saturday, March 3, 2012

Free Tutorial - How to Make Plastic Fusion also know as Plabric

How to Make Plastic Fusion


Sharing my tutorial on how to make plastic fusion:

  
SKILL LEVEL:  Easy
Materials Needed:
Plastic bags needed
        Large piece of plabric:  7 to 9 grocery store t-shirt bags
        Small piece (e.g. pocket size):  1 piece folded multiple times
Wax (Parchment) paper
Iron
Scissors (your good sewing scissors not recommended)
Hard surface
Well-ventilated area


Editor Comments:
·        Make sure bags are clean.  Give the bags a quick wiping inside and out with a damp cloth.  Just takes a few minutes but will pay off at the end.  Nothing worse than to successfully complete the fusion process only to find dirt or food residue melted into the plabric.
·        Through experience, shiny retail and/or trash bags have a tendency to resist fusing.  If you do use these, stick them  in the middle of the stack.
·        Why is 7 to 9 bags recommended:
o   Less than 7 plastic bags have a tendency to scorch more easily even under low heat. 
                   o   More than 9 plastic bags are a little harder to fuse together due to thickness.  If a thicker layer of plabric is needed for your project, go for it.  The fusion process may just take a little longer.
·        Scissors:  Due to the very nature of the material, plastic bags will dull scissors much faster than what fabric would.  Dollar store scissors are recommended.  
Pre-Fusion Preparation:
 Set the iron on a low heat setting such as polyester.


Prepare Bags:
Bottom Seam:  Stack the bags one on top of another lining up the bottom edges then cut off the bottom seams.

            
Handles:   Fold each bag in half lengthwise matching up the handles then stack the bags on top of another.  Cut the handles off at the base.


Fusion:
Cover the hard surface with wax/parchment paper.   2 strips may be needed depending on how wide the plastic bags are.  Place a plastic bag on top of the wax/parchment paper. (Important Note: Bags with print or design should be either placed in the middle or turned inside out if being used on the outside. If you want to show off the print or design on the outer layers, place a clear plastic bag over the print or design to avoid getting ink on your iron.) Continuing layering the bags one on top of another.

                                    
Smooth out the bags after each layer to remove any excess air that could get trapped in between.   Place wax/parchment paper on top to sandwich the bags in between.  Make sure there is plenty of excess wax/parchment paper on the outer edges of the bags because the bags will expand during the fusion process.


Starting in the middle, place a hot iron on the wax/parchment paper for approximately 15 seconds then press the iron out to the edges.  Continue moving the iron from the middle to the outer edge edges until the entire piece is covered. 

Before peeling the wax/parchment paper away from the plabric, check to make sure the bags have successfully fused together.   To determine this, the outer edges should not separate.  It should be one complete piece.  Gently peel away the top and bottom wax/parchment layers from the plastic fabric.   If the wax/parchment paper sticks to the plabric, take a damp rag over that area.  It comes right off.  If an area didn’t fuse while peeling, place the wax/parchment paper back over the area that needs more fusing and press with the iron.


Let me know if you have any questions.    Congratulations on keeping plastic out of the landfill!!!


Tuesday, January 17, 2012

Recycled Into Yarn - a new recycled yarn website

I was perusing through the web and discovered that there are alot of talented recycled designers out there.  Of course, this isn't anything we didn't already know.  But unless you use the right search words, they are hard to find.  I found that unacceptable. 

So my 2012 resolution was to create a website that was a directory of free pattern and tutorials links.  By clicking on the picture of choice, you are linked directly to the designer's website, blog or Ravelry page.  This way everyone leaves happy - the searcher of free pattern and/or tutorial links and the recycled designer. 

Recycled Into Yarn
What will you not find on Recycled Into Yarn website??  NO REGULAR YARN IS ALLOWED!!! 

What will you find on Recycled Into Yarn??  Lots of free recycled yarn crochet and knit patterns and recycled yarn tutorials. 

I encourage you to check it out for yourself and see how different it is from other websites.....

Saturday, January 14, 2012

Free Pattern - Front Post Pop Tab Plarn Bracelet ..added YouTube video tutorial

A fellow crafter buddy, KristyRecycles aka Textiles4You, volunteered to make a YouTube video of my Front Post Pop Tab Plarn Bracelet.  She did an awesome job and I know you'll enjoy it.


Kristy also has several other recycle craft videos that I know you'll enjoy.  You have to check out her YouTube Channel ...   Thank you Kristy!!!

My favorite type of bracelet is one made with pop tabs.    It is very unique and yet versatile.  I'm always trying to come up with different styles. 

Here is a pop tab pattern I came up with: 

Pop Tab Front Post Bracelet
SKILL LEVEL:  Easy

MATERIALS:
·        Crochet Hook – Size F
·        Plastic Yarn:  Approximately 2 standard size plastic grocery bags
      o    If using 2 different colors ,  1 plastic bag for each color
·        14 pop tabs (consistent in size)

Important Note:   Not all plastic is made the same.  When using plarn, achieving the desired size or gauge is dependent on the texture, thickness and strip width of the plastic yarn. 

SIZE:  Diameter – 10.25” around, 3” across
CARE INSTRUCTIONS:  Hand wash, air dry

Helpful Tips: 
·        Read through pattern instructions before beginning.
·        See ‘Tutorials’ for instructions on how-to:
      o    Double Loop Cutting and Looping method
·        Pop Tab hdcfp: Yo, insert hook through front of same pop tab back around to front of next pop tab, yo, pull back through front of 1st pop tab, yo and pull through
         all 3 sts on hook to complete hdc st.
·        When using plarn, stretching your work after every couple of rows is important.  This will give you a more realistic view of what you have completed up to that point.
      o     Instructions:  Grab the band at one end and with other hand grab band at beginning ch row, then give a slight pull.
·       Plastic in general is susceptible to ripping/tearing due to its very nature. 
      o    Weaving in ends - it is best to maneuver your craft needle in between stitches and not through a stitch to avoid splitting the plastic yarn.
·        The edged hole of the pop tab will be considered the 1st hole throughout this pattern and will always be placed under the previous pop tab.


Instructions:
Round 1:  Join with a sl st in 1st hole of pop tab, 2 sc in same hole.   *Grab another pop tab and 3 sc in 1st hole,


*repeat for a total of 14 pop tabs or desired length to fit  wrist. (Tip: If you’re making the bracelet for yourself, this is a good stopping point to measure around your wrist.)


Bring the ends together to form a circle making one more sc in the beginning pop tab.  Join with sl st to 1st sc in same hole.  If using a different color for Round 2 - fasten off, weave in end. 

Round 2:  Sc in same st and in next st, *hdcfp around same pop tab & in next pop tab (pop tab hdcfp: Yo, insert hook through the front of hole  of same pop tab back around to front of next pop tab, yo, pull back through 1st pop tab, yo and pull through all 3 sts on hook to complete hdc st.). 


Sc in next 2 sts, *repeat around to last pop tab.  Join with a sl st to 1st sc.  Fasten off, weave in ends.

Repeat Round 1 and 2 for opposite side of pop tab.


Last Stretch -   With hands on opposite side of bracelet band, gently pull in opposite direction.  Repeat this around.  This will align the pop tabs more uniformly giving the bracelet a tailored-neat appearance. 


ENJOY YOUR NEW FASHION ACCESSORY!!!

I hope you enjoy making one for yourself and anyone.  Send me pictures of what you've made and I will show them off on this post as well as on the http://www.recycledn2yarn.com/crafters-photo-gallery.html.

Let me know if you have any questions.

Thanks again for visiting and please come back soon!!!


Saturday, November 12, 2011

Free Plarn Pattern - Pop Tab Ring of Elegance


Personally, deciding on what piece(s) of jewelry to wear is just as important as deciding on what outfit to wear.    And, big jewelry pieces are definitely the fad right now.  We see it all the time on tv, in the magazines as well as our own day to day social settings. 

That's exactly the concept behind my newest pop/pull tab design - Pop Tab Ring of Elegance.  This ring proves that recycling can be upcycled to something beautiful.


This ring can easily be crocheted in less than 30 minutes.  This is pattern is perfect for all skill levels.  All you need to know is how to make a chain, the single crochet and reverse single crochet. 


Materials needed:
  • 8 pop/pull tabs
  • Size G crochet hook
  • 1 plastic bag of choice
  • Button or Pin or whatever you want to use for complimenting the pop tabs.    Let your creative juices flow.   Here I've used a button that I removed from an old suit jacket that was tossed in the trash.   But, really anything can be used. 
  • Craft needle

Pattern:


Ring Base - Make 2: 
Round 1:  Using the magic circle, make 8 single crochet stitches in the ring (close the ring not tightly, leave a big enough hole for the button hole to go through), slip stitch in first single crochet stitch to complete round. 

Round 2:  Chain 1 and make a single crochet in same stitch, make 2 single crochet stitches in each stitch around, slip stitch in first single crochet stitch to complete round.

Round 3: (reverse single crochet) Chain 1, now working in the opposite direction make a single crochet stitch in each stitch around and join with a slip stitch in first single crochet stitch to complete round.  Fasten off and weave in both ends.


Now for the finger piece:
Row 1:  Chain 3, single crochet in second chain from hook and in last chain, turn.

Row 2:  Chain 1, single crochet in first stitch and in next stitch.
Repeat row 2 until desired fit. 
Determine fit by placing an end on one side of finger then wrap it around ending on other side of finger.  Don't put the ends together because you want a tight fit as there is some stretch with plastic yarn.


Whip stitch the ends to the right side of a ring base.  Noticed I said 'right side' because the wrong side will be sewn to the back of the pop/pull tabs. 


On the other ring base we'll be attaching the pop/pull tabs.  Do this by stitching the right side of 4 pop/pull tabs to the wrong side like clock  hands at 12, 3, 6 and 9.  


Then sew the remaining 4 pop/pull tabs in the empty spaces between the existing pop/pull tabs.  


Don't worry about how it looks because your stitching will be hidden with the other ring base.

Now place your button on top of the same ring base poking the stitch hole through the middle circle and stitch it to the ring base.  Remember, it doesn't matter how it looks because your stitching will be hidden.  
 

You now have 2 separate finished pieces. 


To finish the ring, stitch the 2 ring bases together.  The easiest stitching method I have found is first insert your needle from behind one of the  pop/pull tabs of your choice through a stitch in round 2 to the front.  Then insert the needle in the next stitch over through the middle and out the back of the bottom ring base.  Now working on the bottom, insert the needle in next stitch over, through the middle and to the top of ring.  Repeat this completely around the ring base until both ring bases are stitched together.  You may need to repeat the stitching for a second round just for added security.


Viola - your ring is ready to wear!!!!


Non Pop/Pull Tab Idea:

This pattern works great for those that are not into pop/pull tabs yet.  Just crochet one ring base and finish it by sewing either an oversized button or smaller button to the top.  It still looks great and gives you another fun flirty upcycled jewelry piece.


I would love to see pics of rings you've made with this pattern.    Send them to me at plastiquerecreations@yahoo.com or twooleydesigns@gmail.com.   

You can also find me on Ravelry under 'crochooley'.


MOVE OVER YARN - MAKE ROOM FOR PLARN!!!!